Vík Aurora Photography: Settings & Composition Tips
Vík aurora photography: exact phone and camera settings for the northern lights, Reynisdrangar composition, and editing that keeps the green real.
Photographing the Aurora at Vík's Black Beaches
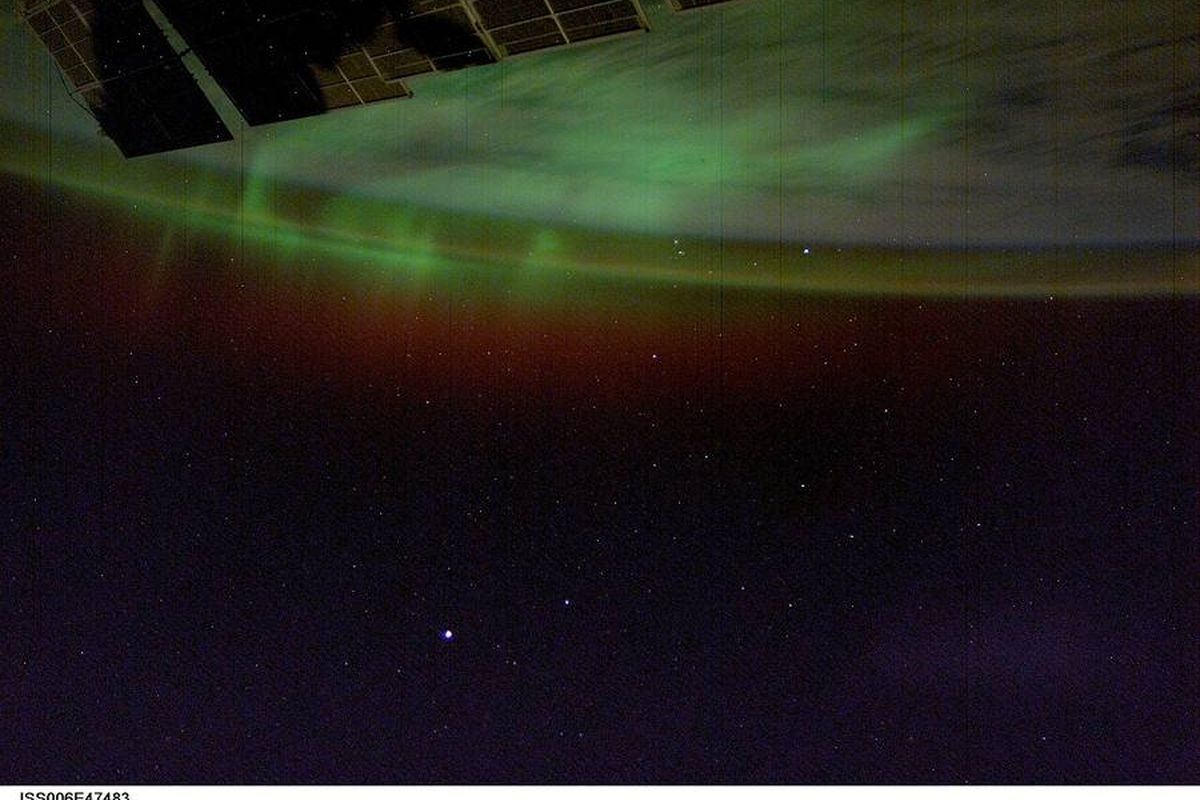
I have sent many travelers to Vík, and the pull of Vík aurora photography is easy to understand once you stand on Reynisfjara at night. This black sand beach sits just east of the village, where the North Atlantic throws up basalt columns and the sea stacks called Reynisdrangar cut sharp silhouettes against the sky. When the northern lights ripple overhead, the contrast of glowing green bands above absolute black shore is the kind of frame that draws shooters from all over the world. Unlike remote highlands, Reynisfjara is reachable by a short drive and has space to set up safely, which makes it a practical choice for both first-timers and pros.
In the sections ahead, we will lay out the exact camera settings northern lights Vík shooters should start with. Plan on a tripod night sky setup, a wide-angle lens, and the long exposure Iceland nights demand. We will talk through ISO aperture aurora starting points for a DSLR aurora Vík kit, then fine-tune for the brightness of the display. The goal is to give you numbers you can trust rather than guesswork in the cold.
We will also preview aurora composition tips that turn a simple snapshot into a story. You will learn how to place foreground aurora black beach elements like wet sand reflections or the basalt cave, and which best lenses Vík visitors pack for full-frame coverage. Editing aurora photos will get its own look, from noise reduction to white balance. By the end, you will have a complete path from setup to finished image.
Gear for Vík Aurora Photography
Lenses for Vík Night Sky Shooting
When I pack for a night shoot, the lens choice shapes everything about the shot. For night sky work, wide-angle fast primes beat zooms in most cases. A prime like a 14mm f/1.8 grabs more light and forces you to compose with intent, which is a core aurora composition tip. Zooms such as 14-24mm f/2.8 give flexibility but often cost you a stop of light. On a cold Iceland night, that stop means the difference between a clean exposure and a noisy one. For foreground aurora black beach scenes, I reach for focal lengths around 14-20mm on a full-frame body. That width lets you plant a chunk of volcanic sand or a driftwood piece in the lower third while the green bands fill the sky. If you shoot APS-C, look at 10-16mm to get the same perspective. The goal is to keep both the near rocks and the distant aurora sharp, so step back and let the lens do the work. A tripod night sky setup is mandatory, but the focal length decides how much of Vík's coast becomes part of the story. That framing is one of the habits that make foreground shots on the black beach succeed. Low f-stop matters because long exposure Iceland shots still need to respect the aurora's motion. When planning camera settings northern lights Vík, I keep ISO aperture aurora balance tilted toward aperture first, then ISO. At f/2.8 or wider, you can use a shutter speed near 5-8 seconds at ISO 1600, freezing the curtains while gathering enough light. Stop down to f/4 and you double the exposure time, risking blur as the lights shift. After the shoot, editing aurora photos recovers shadow detail from the beach without banding. The best lenses Vík visitors bring are those fast wide primes that simply let the night in.
Tripods and Stability for Long Exposure Iceland
I learned the hard way that a flimsy travel tripod fails on Vík's windy shores. During my first session on Reynisfjara black beach, a sudden gust swept my lightweight aluminum model into the surf. For long exposure Iceland work you need a sturdy carbon fiber or aluminum tripod with spiked feet. I hang my backpack from the center column to lower the center of gravity, and I avoid extending the thinnest leg sections unless necessary. Even with a stable tripod night sky platform, tiny vibrations blur the stars. For my DSLR aurora Vík rig I use a wireless remote shutter release and activate mirror lock-up before each shot. This removes the internal slap that happens when the mirror flips in a DSLR. A two-second delay lets it settle. These camera settings northern lights Vík matter more than chasing the lowest ISO aperture aurora combination if your frame is soft. Cold astrophotography sessions drain batteries at alarming speed. I keep three charged cells in my coat pockets and rotate them every 30 minutes. A small USB power bank inside a wool sock feeds the camera when temperatures drop below freezing. Many guides forget power planning, but on a February night near Vík a dead battery ends the shoot. I also pack hand warmers to prevent condensation on my best lenses Vík.
Camera Settings for Northern Lights in Vík
ISO and Aperture for Aurora at Vík
When I first set up my DSLR on Vík's black beach for northern lights, the cold wind off the Atlantic made me glad I had practiced my camera settings northern lights Vík beforehand. For most modern DSLRs, a base ISO starting point of 1600 works well for aurora near Vík. If the bands are bright and active, you can drop to 800 to keep noise low. On a faint night, push to 3200 but expect grain.
Wide aperture is your priority for aurora work. I keep my lens at f/2.8 or wider, f/1.8 if the glass allows, because the aurora can be surprisingly dim. A fast prime lens gathers enough light to reveal those pale green streaks without relying solely on extreme ISO. This wide aperture priority helps capture faint bands that a slower kit lens would miss entirely.
Balancing ISO and aperture for aurora is a constant trade-off between noise and exposure. Open the aperture as far as it goes, then raise ISO only until the long exposure Iceland shot hits about 8 to 15 seconds. Too high ISO adds blotchy noise that ruins the smooth sky; too long a shutter lets stars trail and the aurora smear. I use a sturdy tripod night sky setup and a remote trigger to avoid shake. After the session, editing aurora photos in Lightroom pulls back shadow detail from the foreground aurora black beach without amplifying grain.
For best lenses Vík, I recommend a 14mm or 24mm prime with low distortion. The wide field suits both the lights and the black sand foreground. These settings have served me well on many cold nights, and they keep the process simple when the cold numbs your fingers.
Shutter Speed and Long Exposure Techniques
When I set up for aurora photography on Reynisfjara beach, a solid tripod night sky rig is step one. For sharp stars in a landscape night frame, use the rule of 500: divide 500 by your lens mm to find max shutter before stars trail. On my 14mm wide angle that is about 35 seconds; on a 24mm lens, near 20 seconds. This keeps constellation points crisp while the aurora glows above the black sand. Bright displays let you bend that rule. When the curtain is thick, it makes sense to extend exposure because moving lights blur anyway. I push my DSLR aurora Vík shutter to 45 seconds on active nights, gathering photons so I can lower ISO aperture aurora settings and cut noise. Try f/2.8 at ISO 1600 for 30 seconds, then f/4 at 3200; the first frame stays cleaner. Long exposure Iceland skies forgive a slower shutter when the show is strong, but check your histogram. Reflective black sand is the silent exposure trap. Foreground aurora black beach shots pick up sky glow and bounce it, blowing highlights if you trust the meter. I keep compensation at zero and check blinkies after each frame. If wet sand mirrors the aurora, close aperture a third stop or shorten shutter. Editing aurora photos is simpler when raws keep detail in bright patches. Best lenses Vík travelers bring are fast primes, yet a zoom at f/4 works if you respect reflectivity. Practice these camera settings northern lights Vík and the black beach will reward you.
Shooting RAW and Managing Noise Reduction
When I plan night shoots, the first setting I lock in is the RAW file format. The northern lights show subtle gradients of green, violet, and occasionally red that JPEG compression cannot hold. A RAW file captures the full 14 bit sensor data from your DSLR aurora Vík setup, preserving those faint color shifts near the horizon. If you shoot JPEG, the camera fixes the white balance and clips highlights, so you end up with flat images that are hard to fix later. For camera settings northern lights Vík, RAW is non negotiable because it keeps your options flexible during editing. Many cameras offer in camera long exposure noise reduction, which takes a dark frame after each exposure to remove hot pixels. On a tripod night sky session near the black beach, this doubles your shot time and you may miss a peak burst. I disable in camera NR and clean up in post instead. When editing aurora photos, stacking three to five frames in Sequator or Photoshop cuts random noise better than a single dark frame. High ISO noise reduction is the last step for clean astrophotography. Pushing ISO aperture aurora combinations to f/2.8 and ISO 3200 reveals faint stars but adds grain. In camera high ISO NR smears detail and loses stars, so keep it off. Use targeted noise reduction in editing and protect the star points. This got me printable long exposure Iceland shots with crisp foreground aurora black beach detail.
How to Photograph the Northern Lights with a Phone
No camera? A recent phone gets a usable frame at Reynisfjara on a decent night — but only if you take the settings away from auto, which will fire a flash or pick a 2-second exposure and call it done.
Open your phone's Pro or Night mode and set it manually. Start at ISO 800–1600 and a 5–15 second shutter, shortening toward 5 seconds when the bands move fast so they stay sharp instead of smearing into fog. Drag focus to manual and set it to infinity — lock it on a bright star or the far horizon and leave it. Turn the 3- or 10-second timer on so your finger never touches the glass; tapping the shutter at 10-second exposures guarantees shake. If your phone shoots RAW, switch it on — JPEG processing smears exactly the faint green gradients that make the shot.
The tripod is the part phone shooters skip, and it's the whole game. You cannot hand-hold 10 seconds; mount the phone on a cheap tripod clamp, or brace it against a rock wall or your bag piled on the sand. Battery behavior is the second failure point: cold kills a phone battery mid-burst, so keep the phone in an inside pocket between shots, shoot in short sessions, and carry a power bank that has been living in your jacket — a cold one in the car won't deliver charge either.
Composition transfers straight from the camera advice below: put the Reynisdrangar sea stacks on a third of the frame, keep the horizon low so the sky dominates, and use the wet sand as a mirror when it's calm. A phone's ultra-wide lens shrinks the stacks, so walk closer — above the drift line, well back from the surf — until they carry the frame.
Aurora Composition at Vík Black Beaches
Using Reynisfjara as Foreground for Aurora
When I first tried aurora shots at Reynisfjara, I learned that the basalt stacks make or break the frame. For solid composition, place the Reynisdrangar sea stacks or the nearby hexagonal columns along a vertical third of your shot. A wide perspective with one of the best lenses Vík offers, say a 14-24mm f/2.8, lets you keep the foreground aurora black beach expansive while the northern lights fill the upper sky. I set my DSLR aurora Vík on a heavy tripod night sky stable because the black sand shifts underfoot. Position the stacks to the right and let the green bands sweep across the left, which gives the eye a path into the scene. I agree with the usual advice to keep the main subject off-center. The choice between a pure silhouette and a lit foreground is a real trade-off. A dark silhouette keeps the aurora the hero and simplifies the long exposure Iceland capture, but you lose the texture of the wet pebbles and the shape of the basalt. If you paint the foreground with a dim headlamp during the exposure, the beach gains detail and can reflect the lights. The catch is that any extra light lowers the drama of the night sky. My camera settings northern lights Vík for this balance are usually f/2.8, ISO 2000, 12 seconds, then I recover shadows when editing aurora photos later. Safety rules the whole shoot. Reynisfjara is famous for sneaker waves and fast tides. Before any tripod night sky session, I check the Icelandic tide tables and arrive two hours after high water. I keep my gear above the drift line and never turn my back on the surf. These habits let me focus on ISO aperture aurora choices instead of worrying about a wave taking my kit.
Balancing Night Scene Elements in Vík
When I scout a spot for aurora shooting, I look for a frame that stacks three layers: the North Atlantic in the midground, the black sand beach underfoot, and the green arc overhead. That simple sea-sky-beach sandwich gives your image real depth instead of a flat sky. A wide lens helps, but the trick is placing each element with intent. Foam from a retreating wave makes a perfect leading line. On a calm night the wet sand mirrors the lights, and the thin line of bubbles pulls the eye from the foreground straight to the aurora. I often wait for a wave to roll back so the foam draws a natural path. This is one of those tricks that works again and again at Vík. Scale sells the drama. A lone figure on the sand or a parked campervan near the dunes shows how huge the sky is. For camera settings northern lights Vík, I use a steady tripod night sky, a long exposure Iceland technique, and moderate ISO aperture aurora values. Then I ask a friend to step in for a few seconds. The foreground aurora black beach stays sharp while the person adds story. Later, editing aurora photos, I keep beach shadows deep for contrast. Best lenses Vík conditions favor wide primes, but the composition matters more than glass. Balance the elements and the scene speaks.
Editing and Creative Aurora Techniques
Editing Aurora Photos from Vík Shoots
When I edit aurora photos from a Vík shoot, I always shoot RAW. My editing workflow begins in Lightroom with noise reduction. Long exposure Iceland nights push ISO high, and cold sensors render grain. I set luminance reduction near 45 and detail around 20 to keep stars crisp. Color noise reduction at 25 removes purple speckle in shadows. For DSLR aurora Vík files, I run a hot pixel heal since static dots appear in 20-second frames. This RAW step rescues muddy shots.
White balance is where green and magenta bands fight. The camera settings northern lights Vík enthusiasts use often default to auto, but I prefer fixed 4000K in capture and fine-tune later. In editing aurora photos, the green lower curtain sits around 3500 to 4500K, while upper magenta needs a tint shift in the HSL panel. I paint a soft mask on the pink fringe and nudge temperature cooler so the band stays distinct. These editing choices keep the sky believable rather than neon.
Masking the foreground aurora black beach separately is the final step. Black sand at Vík reflects faint aurora glow, and a global adjustment washes it gray. I use a linear gradient from the waterline up, then invert to protect the beach. With a sturdy tripod night sky setup, the foreground stays sharp at f/2.8, so I lower exposure on sand by half a stop and add clarity only to wet rocks. Best lenses Vík trips taught me wide primes capture more beach texture, and separate masking preserves detail while the ISO aperture aurora balance in the sky remains untouched.
Timelapse and Star Trails at Vík
When I plan a night of shooting, the first creative step beyond single frames is a timelapse. For aurora timelapse at Vík, set your intervalometer to fire every 3 seconds with a shutter speed of 8 to 12 seconds. That gap keeps the sequence smooth without dropping frames. Use manual mode with an aperture of f/2.8, ISO around 2000, and manual focus locked on the stars. A solid tripod night sky setup matters because Reynisfjara's wind will shake a light stand. These camera settings northern lights Vík work well for moderate activity; bright curtains may need shorter exposures.
For star trails over Reynisfjara, I like to stack shots rather than leave the shutter open for one hour. Take 120 frames at 30 seconds each, ISO 800, f/4, with a wide lens. The basalt sea stacks make a good foreground aurora black beach composition. In post, use StarStaX or similar editing aurora photos tools to blend the light paths. This method avoids noise buildup and lets you keep a clean foreground. Composition here means placing the stacks off-center and letting the aurora sweep above them.
DSLR aurora Vík shoots demand cold-weather planning. Batteries die fast below freezing, so I carry three and rotate them inside my jacket. Check the Icelandic forecast for cloud cover and wind before driving out. Planning your outing around a new moon helps maximize darkness. Long exposure Iceland nights mean you'll wait, so pack a thermos and a headlamp with red light. Best lenses Vík for this work are 14-24mm f/2.8 zooms or fast primes. With ISO aperture aurora tuned and patience, you'll come home with good sequences.
Wrapping Up Vík Aurora Photography
After spending nights on Vík's black sands, I've learned that good Vík aurora photography really comes down to a few core habits. For camera settings, northern lights viewers in Vík should memorize a wide aperture around f/2.8, ISO between 1600 and 3200, and a shutter speed near 8 to 15 seconds depending on how the aurora moves. A sturdy tripod is non-negotiable for sharp long exposure shots in Iceland. Aurora composition tips only stick when you test them in the field. I suggest returning to foreground spots like Reynisfjara at least three times across different moon phases. Practice with your DSLR kit until balancing ISO and aperture feels automatic. The black pebbles and sea stacks give you leading lines that make even a faint display look intentional. Your next step is to plan a dedicated night shoot using a simple checklist. Pack the lenses Vík conditions demand (wide-angle primes), spare batteries, a headlamp, and a lens cloth for mist. Before leaving, review your editing workflow so you can polish raw files later. Set a reminder for a clear forecast, arrive an hour before dusk, and let the practice from these beaches build your confidence. A printed checklist taped to your bag helps when gloves make phone use awkward in the cold wind.
Official sources
Details worth verifying before you go — checked against:
Travel Writer & Editor
Emily Johnson writes and edits Do Travel Blog. Every guide on the site starts the same way: with a question she actually had while planning — when to book, which pass to buy, how to get from A to B without overpaying. Where a number matters, she cites the source: park tickets link to the park's own fee page, visa rules to the official consulate, ferry times to the operator. Prices get re-checked against those pages before each update, and a guide is re-dated when its numbers move. Nothing here is sponsored — she doesn't accept payment for coverage. Spotted something stale or wrong? Email hello@dotravel.blog and she'll fix it.