My India Visa Experience: What to Watch For
Read my India visa experience to learn how to get an India visa without common mistakes. Practical India visa tips on application, photo requirements, biometric appointment, and more.
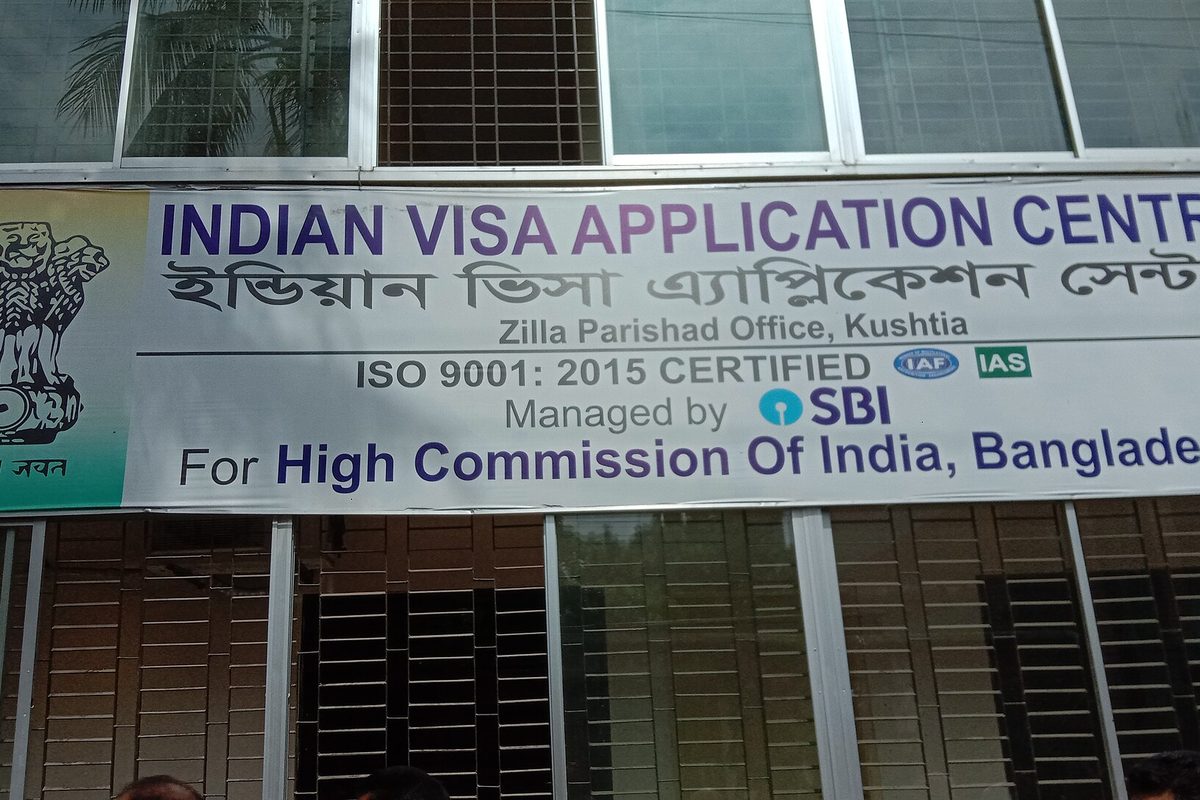
Why I Decided to Share My India Visa Experience
Why Knowing the Process Before You Apply Matters
I was staring at my laptop screen, a photo of myself with a slight smile, ready to upload it for my Indian visa application. At the last second, I noticed the fine print: the photo had to be perfectly square, with a plain white background and no shadows. My living room wall was off-white, and the smile was too wide. That near-mistake would have meant a rejected application and a delayed trip. It was the moment I realized how many small details can trip you up.
That's why I'm sharing my India visa experience here - not a dry list of rules, but a step-by-step personal narrative of how I actually got my visa. If you're wondering how to get India visa without the stress, this walkthrough covers everything from the first research session to the moment I landed in Delhi. I'll show you where I almost stumbled and what I learned along the way.
The scope of this guide is practical: choosing the right e visa India category, gathering documents that meet the exact visa photo requirements, understanding the visa processing time, and avoiding common visa mistakes like selecting the wrong port of entry. Each stage has its own pitfalls, and I'll flag every one so you know what to watch for.
Starting the Journey: Researching Your India Visa Options
Understanding the Different Visa Categories
When I first started researching how to get an India visa, I was surprised by the number of options. The main categories are tourist, business, and the e-Visa system (which splits into e-Tourist and e-Business). Each serves a different purpose, and picking the wrong one can waste time and money. My India visa experience taught me that understanding these categories upfront saves headaches later.
The e-Visa is the most convenient for short trips. You apply online, upload a photo and passport scan, and typically get approval within 72 hours. It's valid for 30 days to 5 years depending on the subtype, but you can only stay for 90 days per visit (180 for business). The regular visa, obtained through a consulate, takes longer but offers longer stays and multiple entries without the e-Visa's entry restrictions. For my trip, the e-Tourist visa worked perfectly because I was visiting for three weeks.
A crucial India visa tip: always use the official Indian visa application website (indianvisaonline.gov.in) for regular visas or the e-Visa portal. Scam sites mimic the government site, charging inflated fees. I nearly fell for one that looked identical but added a $50 'service fee'. The real site is straightforward and lists all fees upfront.
Before applying, check your passport validity. India requires at least six months remaining from your date of arrival. My passport had eight months left, so I was fine. If you're close to the six-month mark, renew first. This is a common visa mistake that can derail your plans.
Choosing the Right Visa for Your Trip
Choosing the right visa for India is the first real decision, and it shapes everything that follows. You need to match your trip's purpose, duration, and planned entry points to the visa options. For a standard tourist visit, the e-Visa is the most convenient option. I chose the e-Visa tourist because it covers tourism and short stays, and the application is entirely online. The trade-off is that you must enter through one of the 29 designated airports or six major seaports, and the stay is capped at 90 days. If you plan to enter by land or stay longer, a regular paper visa is better.
Before you start the how to get India visa process, check the basic eligibility: passport valid for at least six months from arrival, a recent digital photo with a white background and no glasses, a return ticket or onward travel proof, and a rough travel itinerary. The application asks for a few places you'll visit. I listed my arrival city and a couple of destinations, and that was accepted.
- Passport with two blank pages and six months validity
- Digital photo, white background, no glasses
- Return ticket or onward travel proof
- Rough itinerary (first few stops)
Getting these right upfront makes the decision step smoother and avoids common mistakes. Taking an extra few minutes to pick the right visa type and verify your documents will save you from delays later in the India visa experience.
The Application Form and Photo Requirements
Filling the Online Application Form Accurately
The e-Visa application form is straightforward but surprisingly easy to slip up on. You start by selecting your visa type: e-Tourist, e-Business, or e-Medical. Then you fill in personal details exactly as they appear on your passport, including your given names, surname, nationality, and passport number. The next sections ask for your date of birth, gender, place of birth, and address. After that comes travel information, like your intended port of arrival and date of entry. A separate page handles the photo upload, which has its own strict rules about size and background. The entire application form fill takes about 20 minutes if you have your passport and a digital photo ready.
The most common mistakes I see are name mismatches and wrong visa type. Every field must match your passport exactly, including middle names. If your passport shows a middle initial but you type the full name, or vice versa, your application could be rejected. I almost fell into the visa type trap myself. I was applying for a tour, but I had a business meeting pop up, and I briefly considered ticking the e-Business box. Reading the requirements more carefully, I realized the e-Business visa requires a letter of invitation from an Indian company. I had none, so I stuck with the tourist visa. That split-second decision saved me from a denial.
Before you hit submit, go back and read every field out loud. Check your photo against the published guidelines too. I always triple-check my passport number and date of birth because those are the two fields that cause the most delays. A single typo can add weeks to your visa processing time or trigger a rejection. The online form does not allow major edits after submission, so accuracy at the start is everything. Take the extra five minutes to verify; it beats the stress of reapplying.
Meeting the Visa Photo Requirements
When I applied for my first India visa, I thought a simple passport photo would do. I learned the hard way that the visa photo requirements are stricter than standard passport photos. The official specs call for a 2x2 inch photo with a plain white background, no shadows, and a neutral expression. You cannot wear glasses in the photo, even if you wear them daily. The head must be between 1 inch and 1 3/8 inches from chin to crown, which is larger than most people expect.
My first attempt was rejected because of a faint shadow behind my head. I had taken the photo at home against a white wall, but the lighting was uneven. Another friend had her photo rejected because she was smiling too broadly. The visa photo requirements are very specific: no shadows, no glare, and the photo must be recent, ideally within the last six months. Even if your passport is still valid, they check the photo date.
My recommendation is to use a professional photo service that knows the India visa photo requirements. Many drugstores and shipping centers offer visa photo services for about $10-15. Alternatively, you can use a reliable online tool that checks the photo against the official specs before you upload it. This small investment saved me from a delay that could have set back my entire trip. Following these India visa tips from the start made the process much smoother.
Gathering Supporting Documents
When I applied for my India visa, gathering supporting documents took some careful planning. The standard checklist includes:
- Clear copy of your passport bio page (valid for at least six months)
- Recent passport-style photo meeting size and background requirements
- Your travel itinerary showing flights into and out of India
- Confirmed hotel bookings for every night of your stay
For the travel itinerary, you don't need to have every internal flight booked, but you should show a clear arrival and departure plan. One of the biggest India visa tips I can share is to make sure your return ticket is clearly visible in your itinerary. Immigration officers want to see a definite departure date. Similarly, have proof of accommodation for every night, even if it's just a hostel booking.
My personal tip: keep scanned copies of every document in a single folder on your phone and computer. That way, if you need to re-upload or fill out a new form, you have everything at your fingertips. This simple doc preparation step saved me from scrambling when I had to re-submit a photo.
The Biometric Appointment and Interview
Preparing for the Biometric Appointment
After your online application is submitted, the next step is the biometric appointment at the visa application center. You'll provide fingerprints, a digital photograph, and submit original documents for verification. The process is straightforward: they scan all ten fingerprints, take a photo that meets the same photo standards (white background, no glasses, ears visible), and an officer checks your passport and supporting paperwork. The entire biometric collection takes about five minutes, but the waiting time can be much longer.
I learned this the hard way at the Lisbon center. Despite booking a specific time slot, the queue snaked around the room and I waited over an hour. The actual fingerprinting and photo took under two minutes. My first India visa tip: arrive at least 15 minutes early and expect a wait. Bring a book to pass the time.
For the appointment itself, bring all original documents listed on your application checklist - passport, photos, supporting letters - plus a printed copy of your appointment confirmation email. This is one of the most common visa mistakes I've seen. The center staff will not process you without that confirmation slip. Also, dress neatly. A clean, professional appearance helps during document verification.
If you're aiming for a smooth India visa process, the biometric appointment is a formality, but showing up prepared prevents delays. Keep documents organized, confirm the photo meets requirements, and double-check your email for the confirmation printout. These small India visa tips can save you an extra trip to the center.
The Embassy Interview: Common Questions and Tips
Not every applicant needs to sit for an embassy interview, but if you are applying for a regular visa rather than the e-Visa, you will almost certainly face one. The officer wants to confirm that your trip is genuine and that you will return home. Expect questions about your purpose of visit, your daily itinerary, and your ties to your home country. They might ask about your job, family, or property back home. I remember my own interview: the officer asked me to walk through my whole travel plan day by day.
That is when one of the best India visa tips I can share kicked in: prepare specific answers ahead of time. I had a printed itinerary with hotel names, train numbers, and even a few restaurant reservations. When I could rattle off exactly where I would be on day three, the officer nodded and moved on. Honesty and confidence go hand in hand. If you do not know an answer, say so clearly rather than inventing something. A straightforward, well-rehearsed response shows you are a low-risk traveler and makes the whole process smoother.
After Submission: Processing Time, Fees, and Tracking
Understanding Visa Processing Time
I submitted my e-Visa application on a Thursday afternoon, thinking the weekend would give me a head start on packing. It was the first lesson in my India visa experience: the clock doesn't tick on Saturdays and Sundays. My application sat idle for two full days before anyone even looked at it.
Typical e-Visa processing takes 3 to 5 business days, but regular visa applications can stretch to two weeks or more. The official visa processing time estimate assumes you submit on a Monday and that there are no holidays or hiccups. I learned the hard way that if you apply close to a weekend, you effectively add two days to the wait.
What else can slow things down? Indian national holidays, incomplete information on the Indian visa application form, and verification requests from the consulate. Visa photo requirements are also a common culprit. If your photo doesn't meet the strict specs, the system may flag it, adding another day or two. In my case, a minor mismatch in my passport number caused a three-day delay.
Here is the most practical India visa tip I can offer: apply at least two to three weeks before your departure date. That gives you a comfortable buffer for any unexpected delays. Managing your expectations around how to get India visa quickly is all about timing. Don't cut it close. The visa processing time is rarely as fast as you hope.
Payment Methods and Common Pitfalls
Paying for the visa was my first real snag. The e-Visa portal accepts credit and debit cards (Visa, Mastercard, and sometimes Amex) plus online banking for Indian bank accounts. I used my credit card, thinking it would be straightforward.
But my payment failed twice. The first time I got a generic 'transaction declined' error. The second time the page just timed out. I was frustrated, thinking the portal was broken. After a call to my bank, I learned they had blocked the transaction because India was flagged as a high-risk country. They explained that many banks automatically block international payments to unfamiliar merchant accounts. I had to confirm it was a legitimate transaction, then retry.
The lesson: if you're wondering how to get India visa payment to go through, make sure your card has international transactions enabled. Call your bank before you start. Also be aware of currency conversion fees. The portal charges in Indian rupees, so your card issuer will apply their own exchange rate plus a foreign transaction fee, often 2-3%. That's a hidden cost you should budget for.
Beyond the bank block, I've heard from others about payment gateway errors during peak hours. The system can be glitchy. My advice: try during off-peak times (early morning or late night) and have a backup card ready. A small extra step, but it saves the headache.
Arriving in India: Immigration and Registration
Completing the Arrival Card Correctly
The tiny arrival card they hand out on the plane or that you grab at the immigration counter is easy to dismiss when you are tired from travel. But a rushed, sloppy card can cost you precious minutes at the desk. Fill it out in neat block letters, not cursive. You will need your flight number, the full address where you are staying in India, and the exact duration of your visit.
The most common mistakes I saw around me were illegible handwriting, a hotel address copied wrong from a phone screen, and, surprisingly often, a missing signature at the bottom. The officer will hand it back if anything is unclear, and you will have to re-queue. I also noticed people forgetting to note their e visa India reference number on the form, though it is not always required.
My own tip: always carry a pen, because the airline crew may run out, and a small printout of your hotel address. That way you copy it letter for letter instead of relying on spotty Wi-Fi. Once stamped, tuck the card inside your passport and keep it there until you depart. Immigration may ask for it again, and losing it means filling out a duplicate form at the airport.
Important: FRRO Registration for Long Stays
If your India visa lets you stay longer than 180 days, or if you hold certain visa types like a business visa, the law requires you to register with the Foreigners Regional Registration Office (FRRO) within 14 days of arrival. I almost missed this deadline myself. My e-visa was only for 60 days, so I assumed registration didn't apply to me. But a friend who had a business visa mentioned the 14-day rule, and I double-checked my visa conditions. That's when I realized I needed to register anyway because my total planned stay exceeded 180 days due to a later extension. A simple calendar reminder three days before the deadline saved me from a fine or worse.
The FRRO registration process is straightforward but requires preparation. You need to visit the local FRRO office in person, submit copies of your passport, visa, and proof of address in India, along with two passport-sized photos that meet the official specs. They also take biometrics (fingerprints and a photo) and charge a fee. The entire process takes about an hour if you have all documents ready. Failing to register can lead to a hefty fine, deportation, or trouble with future Indian visa applications. One India visa tip I always share: set a reminder for the 14th day after arrival, and check the FRRO website for any online appointment options to save time. It's a small step that prevents big headaches.
Final Thoughts: Key Takeaways from My India Visa Experience
Apply Early, Be Thorough, and Enjoy Your Trip
Looking back on my India visa experience, I realize it wasn't as daunting as I'd feared, but only because I planned ahead. The three lessons that saved me were: start early (I applied six weeks before my flight, which gave me breathing room when the processing took longer than expected), double-check every detail (I nearly submitted a photo with the wrong white balance, catching it only because I compared the requirements side by side), and keep copies of every document and confirmation page. That last one saved me when the system glitched and I had to re-upload a file.
Above all, use the official Indian government e-Visa portal, not a third-party broker. I saw friends pay extra fees for services that did nothing except fill in the same form. The official site is straightforward, and you can track your application directly. If you follow the list of required documents exactly, especially the visa photo specifications, you'll avoid the most common mistakes that slow down processing.
Despite the paperwork, India is worth every bit of the hassle. The food, the colors, the chaos, it's an experience that stays with you. I'd love to hear how your own India visa journey goes. Share your story or ask questions in the comments below.
Official sources
Details worth verifying before you go — checked against:

Travel Writer & Editor
Emily Johnson writes and edits Do Travel Blog. Every guide on the site starts the same way: with a question she actually had while planning — when to book, which pass to buy, how to get from A to B without overpaying. Where a number matters, she cites the source: park tickets link to the park's own fee page, visa rules to the official consulate, ferry times to the operator. Prices get re-checked against those pages before each update, and a guide is re-dated when its numbers move. Nothing here is sponsored — she doesn't accept payment for coverage. Spotted something stale or wrong? Email hello@dotravel.blog and she'll fix it.