Layering System for Cold Weather Hiking: A Nepal Trek' Guide
Learn the perfect hiking layering system for cold weather mountain hiking. A Nepal trek guide covering base, mid, and outer layer choices for Everest Base Camp, Annapurna, and more.
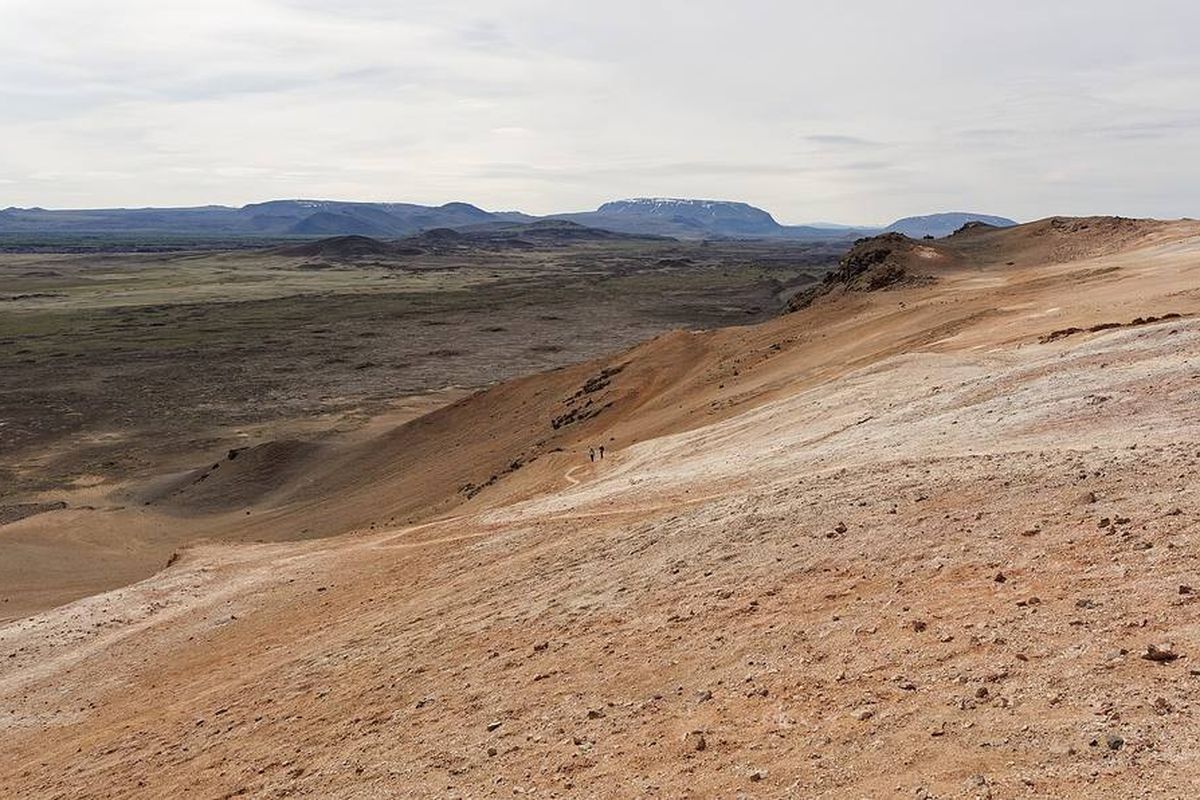
Mastering the Layering System for Cold Weather Hiking in Nepal
Proper layering can make or break a Nepal trek. On a single day you might start in a warm valley at 25°C, climb through rhododendron forests, and crest a freezing pass at 5,000 meters where the wind chill drops to -15°C. Without the right hiking layering system, you either sweat through your base layer or shiver in an inadequate jacket. This guide explains the full mountain hiking clothing layers, from what touches your skin to the waterproof shell that blocks the wind, so you understand how to layer for cold weather hiking with confidence, no matter what the Himalayas throw at you.
Nepal's trails demand a system that adapts quickly. The same hike that has you loosening your fleece jacket hiking in the midday sun will have you zipping up a down jacket mountain traverse as clouds roll in. You need a merino wool base layer that wicks moisture, a breathable mid layer hiking piece like a 100-weight fleece, and a versatile outer layer hiking shell that stops snow and gusts. Many trekkers also carry a lightweight softshell jacket for dry, windy sections and a dedicated rain jacket hiking shell for the inevitable afternoon showers.
After reading, you will know exactly which base layer hiking garments, insulating mid layers, and protective outer shells to pack for a Nepal trek and how to combine them as conditions shift. This is the foundation for every comfortable, safe day on the trail.
Why the Layering System Matters for Nepal Trekking
The Science of Layering: How Insulation, Moisture, and Wind Interact
The physics behind successful layering is straightforward: still air is an excellent insulator, while moisture conducts heat away from the body rapidly. When you wear multiple thin layers, each one traps a pocket of air that warms up from your body heat. The challenge is that any sweat produced during exertion must escape through those layers; otherwise, the moisture soaks into the fabric, collapses the air pockets, and triggers evaporative cooling. A wet base layer on a 20F morning in the Annapurna foothills can drop your core temperature dangerously fast, regardless of how many fleece or down jackets you pile on top.
This is where the mountain hiking clothing layers must work in sequence. The base layer, typically merino wool or a synthetic like polyester, sits against your skin and wicks moisture outward. The mid layer, usually a fleece jacket or a thin down jacket, provides insulation by holding that warm air, but it must remain breathable so vapor can pass through. The outer layer, whether a rain jacket or a softshell jacket, then blocks wind and precipitation while allowing enough airflow to prevent internal condensation. Breathability ratings, measured in grams of water vapor per square meter per 24 hours, become critical: a good rain jacket for Nepal hiking should offer at least 10,000 g/m²/24h to keep you dry from both outside rain and inside sweat.
Temperature regulation on a mountain trek demands constant adjustment. Climbing a steep pass at 3,500 meters in direct sun might require just a base layer hiking top and a lightweight fleece, but the moment you stop for a rest or descend into a shaded valley, the wind chill can drop the perceived temperature by 10C. Adding a down jacket mountain layer or swapping a softshell for a hardshell instantly restores warmth. The key to how to layer for cold weather hiking is to treat the system as a modular toolkit: vent, unzip, remove, or add as the terrain and weather shift, rather than sweating through a single heavy garment.
How Nepal's Mountain Climate Demands Smart Layering
On a typical day trekking to Everest Base Camp, you start at dawn with frost on the trail and end at noon in short sleeves. That rapid temperature swing from well below freezing to 20°C (68°F) is the hallmark of Nepal's high-altitude climate. Add lower oxygen, intense UV, and dry air that speeds dehydration, and you have a climate that demands a flexible clothing system. Whether you're on the Annapurna Circuit, Langtang Valley, or Everest Base Camp, the principle is the same: start cold, warm up as you climb, and shed layers for the midday sun.
Seasonality also plays a role. Autumn (September to November) and spring (March to May) are the prime trekking windows, requiring full mountain hiking clothing layers despite stable weather. Monsoon (June to August) brings heavy rain; winter (December to February) delivers snow and bitter cold. Knowing how to layer for cold weather hiking is not just about comfort, it's safety. A well-chosen merino wool base layer, a breathable fleece jacket as a mid layer, and a reliable waterproof shell as your outer layer can mean the difference between a successful summit and a dangerous situation.
Base Layer: The Foundation of Your System
Choosing the Right Base Layer Material
The base layer is the foundation of any layering setup, responsible for moisture management and comfort. For cold weather mountain hiking, the choice between merino wool and synthetic fabrics determines how well you stay dry and warm during high-altitude treks in Nepal.
Merino wool is widely regarded as the top choice for high-altitude hikes, and for good reason. It offers exceptional breathability, allowing sweat vapor to escape while actively pulling moisture away from the skin. Merino wool is naturally odor-resistant thanks to its antimicrobial properties, meaning you can wear a merino wool base layer for several days without the smell becoming overpowering, a critical advantage on multi-day treks like the Annapurna Circuit or Everest Base Camp. However, merino wool dries more slowly than synthetic fabrics, especially in humid conditions, and it typically costs more.
Synthetic base layers, made from polyester or nylon blends, dry much faster and are more affordable. They are a better choice for wetter conditions, such as trekking through the lower, rainier sections of the Langtang Valley, where a merino layer might stay damp longer. Synthetic fabrics also offer similar breathability and come in a range of prices, making them a budget-friendly option for beginners building their mountain hiking clothing layers.
Both materials are available in different weight classes. Lightweight base layers are suitable for high-exertion hiking in mild cold, midweight is the most versatile for typical Nepal trekking conditions, and expedition weight is reserved for extreme cold above 4,500 meters. A midweight merino wool base layer is the recommended starting point for most trekkers, offering a balance of warmth, breathability, and odor management that justifies its higher price.
Base Layer Features for High-Altitude Hiking
A well-fitted base layer is the first and most critical component. The fit should be snug against the skin without restricting movement: tight enough to pull moisture away from your body, but loose enough to allow a full range of arm and leg motion. When you reach overhead or twist your torso on a steep Nepal trail, the fabric should shift with you, not bind. This precision fit is what makes merino wool and synthetic blends the go-to choices for base layer hiking.
Flatlock stitching is a non-negotiable feature for mountain hiking clothing layers. Traditional seams create raised ridges that rub against backpack straps, hip belts, and armholes, leading to painful chafing over a 10-hour day. Flatlock seams lie flat against the skin, eliminating that friction point. Pay equal attention to hiking underwear: boxers, briefs, and sports bras should all use flatlock construction and a moisture-wicking fabric. Merino wool or synthetic briefs prevent chafing on long descents, and a well-fitted sports bra with flat seams reduces shoulder strap irritation under a pack.
To make your base layer last, wash it inside out in cold water on a gentle cycle, and never use fabric softener: it coats the fibers and reduces wicking performance. Air dry away from direct heat. With proper care, a quality 150-200 gsm merino wool or synthetic base layer will hold its shape and function for multiple seasons of how to layer for cold weather hiking on Nepal's high passes.
Mid Layer: Trapping Heat Effectively
Fleece Jackets: Lightweight and Breathable Insulation
Fleece jackets are the workhorse mid layer, especially when you are actively climbing and generating body heat. Unlike static insulation, fleece breathes well enough to prevent overheating during sustained effort, making it a favorite for Nepal's steep ascents.
- Grid fleece (e.g., Patagonia R1, Melanzana) uses a waffle pattern that traps heat while maximizing airflow, ideal for high-output trekking.
- Microfleece (100-weight) is lightweight and packable, best for milder days or as a second layer under a shell.
- Heavyweight fleece (200-weight) offers more warmth but less breathability, better suited for camp or low-output days.
Breathability is fleece's key advantage over down. While a down jacket mountain layer excels at static warmth, it loses insulating power when damp and restricts moisture vapor escape. Fleece continues to wick moisture even when wet, making it a reliable choice for the variable weather of Nepal's mountain trails.
For a typical Nepal trek, a 100-200 weight fleece jacket hiking layer is the sweet spot. A 100-weight microfleece or grid fleece works well under a shell for most active hiking; a 150-200 weight can serve as a standalone outer layer on warmer days. This range balances warmth, weight, and breathability for the demands of how to layer for cold weather hiking in the Himalayas.
Down Jackets: Maximum Warmth for Static Moments
A down jacket is the most efficient way to trap heat when your body stops generating it through movement. On a Nepal trek, this happens at every camp setup, lunch break above 4,000 meters, and summit push on a peak like Island Peak or Lobuche East. While your fleece or active insulation keeps you warm while hiking, a down jacket is reserved for static moments when your core temperature drops fast without the metabolic heat from walking.
Down offers the best warmth-to-weight ratio of any insulation. A 700-fill down jacket can weigh under 400 grams yet provide enough warmth for temperatures down to -10 degrees Celsius when worn over a proper base layer and mid layer. Fill power measures the loft, or fluffiness, of the down: 600-fill is budget-friendly but heavier for the same warmth, 700-fill is the standard for most Nepal treks, and 800-fill or higher is ultralight for climbers who count every gram. The trade-off is cost and durability. Higher fill down is more expensive and compresses better but requires careful storage.
Synthetic insulation, like Primaloft or Thermoball, performs better when wet but weighs more and loses loft faster over time. In Nepal's dry autumn and spring seasons, down is the practical choice because you can keep it dry inside your pack or in a dry tent. You should never wear a down jacket while hiking uphill. Sweat will soak the down and destroy its insulating ability. For that reason, the down jacket is typically worn as a mid layer under a hardshell only during summit pushes above 5,000 meters, or as a standalone outer layer around camp and at rest stops. Most trekkers carry a synthetic jacket for active use and a down jacket for static warmth, completing the kit for cold weather mountain hiking.
Outer Layer: Shielding from Wind, Rain, and Snow
Hard Shell vs. Softshell Jackets: Which is Right for Nepal?
Choosing between a hard shell and a softshell jacket depends on the specific conditions you'll face on the trail. In Nepal, where weather can shift from bright sun to sudden rain or snow within hours, understanding the difference is critical for staying comfortable.
A hard shell, like a 3-layer Gore-Tex rain jacket, offers complete waterproof and windproof protection, making it the go-to outer layer for sustained rain or snow. During the monsoon season in the Annapurna region, a hard shell is essential to keep you dry. In contrast, a softshell jacket provides stretch, breathability, and light water repellency. It works well for dry but windy conditions, such as on the arid trails of the Upper Mustang, where you need wind protection without overheating.
Key features include pit zips for ventilation, a hood that fits over a helmet, and packability for when the sun comes out. A hard shell that packs into its own pocket fits easily into a daypack, while a softshell with a helmet-compatible hood is ideal for technical sections. Both are essential components of a complete mountain hiking clothing layers system.
Waterproof Hiking Pants: Essential or Optional?
Waterproof hiking pants are not always essential, but knowing when to carry them can make or break a day on the trail. On Nepal's high passes like Thorong La (5,416 m) or during the spring monsoon, persistent rain, snow, and wet brush demand full protection. Without a waterproof shell, your legs will quickly soak through, leading to rapid heat loss and increased risk of hypothermia. In these conditions, a pair of lightweight, packable rain pants becomes a critical part of any mountain hiking clothing layers system.
Softshell pants offer a middle ground. They block wind, shed light drizzle, and breathe far better than a waterproof membrane. For dry, cold days on the Annapurna Circuit, many trekkers prefer softshells because they double as both a mid and outer layer during active hiking. However, in sustained rain or wet snow, softshells wet out. The standard approach is: a merino wool base layer on the legs, hiking pants (softshell or lightweight trekking trousers), and waterproof rain pants carried in the pack for when conditions deteriorate.
A practical Nepal tip: most teahouse trekkers manage with just softshell pants and a pair of knee-high gaiters. Gaiters seal the gap between boot and pant leg, keeping snow and mud out, and reduce the need for full waterproofing. Unless you are hiking in the monsoon or crossing deep snow, a dedicated pair of waterproof hiking pants may remain unused. Still, for how to layer for cold weather hiking safely, packing a 200-gram rain pant is cheap insurance against a sudden storm.
Additional Layers and Accessories
Hiking Socks: The Often Overlooked Base Layer for Feet
For any cold-weather hiking layering system, the feet deserve as much attention as the torso. A high-quality merino wool hiking sock is the foundation: it insulates when wet, wicks moisture away from the skin, and resists odor over multiple days on the trail. The thickness of the sock should match the boot volume and the expected temperature. Thin liner socks, typically 0-1 mm thick, are best for warm conditions or as a base layer under a heavier sock. Medium cushion socks (2-3 mm) work for most three-season trips. Heavy cushion socks (4-5 mm) are reserved for deep cold or when wearing boots with extra room.
When temperatures drop below freezing, an effective strategy is to layer two socks: a thin silk or synthetic liner next to the skin, topped with a thick merino wool outer sock. This two-layer approach traps air between the layers for extra insulation and shifts friction to the sock-sock interface rather than the skin, reducing blister risk. The liner also wicks moisture into the outer sock, keeping the foot drier.
Blister prevention depends on a snug but not tight fit. If the boot is too tight after adding a thick sock, the restriction of blood flow will cause cold feet and increase friction. Test the layering system with the boots at home: you should be able to wiggle your toes freely. When you plan your how to layer for cold weather hiking checklist, remember that mountain hiking clothing layers extend from your head to your toes, and the socks are the most critical element for foot comfort on a long Nepal trek.
Headwear, Gloves, and Neck Gaiters
Head and hand protection are often overlooked when planning for cold weather, but they are critical for comfort and safety on cold weather mountain hiking trips. In Nepal's high-altitude terrain, wind chill can drop apparent temperatures far below freezing, making proper accessories non-negotiable.
For the head, a merino wool beanie or fleece balaclava provides warmth while a lightweight buff can be pulled up over the face for wind protection. A buff is more versatile than a scarf because it can be adjusted to cover the neck, face, or ears without bulk.
Gloves require a system: thin liner gloves underneath insulated mittens. The liners allow you to handle zippers or camera buttons without exposing skin, while the mittens provide the warmth needed for extreme cold. Avoid bulky single-layer gloves that lack dexterity.
At high altitude, sun protection is essential even in cold weather. A wide-brimmed hat and UV-blocking sunglasses prevent sunburn and snow blindness, which can occur at any time of year above treeline. These accessories complete the mountain hiking clothing layers for a safe and comfortable trek.
Putting It All Together: A Nepal Trek Layering Strategy
Daytime Hiking vs. Evening Camp: Adapting Your Layers
On a typical Nepal trekking day, you start before dawn in near-freezing temperatures. Your layering begins with a merino wool base layer, a fleece jacket as mid layer, and a softshell jacket as outer layer. Within 30 minutes of uphill walking, you shed the softshell and fleece, stripping to just your base layer hiking shirt. By mid-morning, you hike in your base layer, fleece tied around your waist. A breathable fleece prevents overheating during active climbs. At the lunch stop at a teahouse, you quickly add your fleece and outer layer before the chill sets in. This cycle of adding and removing layers defines how to layer for cold weather hiking in Nepal.
Evening at camp demands a different setup. Your body temperature drops rapidly after a day of effort. You add your down jacket, preferably 700-fill or higher, along with a warm beanie and insulated pants or puffy pants. Gloves and a neck gaiter are also essential for camp. These mountain hiking clothing layers are for stationary warmth, not hiking. A pair of waterproof hiking pants can also serve as a windproof outer layer over your insulated pants.
For sleeping, your base layer hiking set becomes sleepwear. A clean, dry merino wool base layer keeps you warm without overheating. Many trekkers keep their down jacket inside the sleeping bag for extra warmth during the coldest hours before dawn.
Sweat management is critical. Cotton has no place in your hiking underwear or any layer, it stays wet and chills you. Use zippers on your fleece jacket and softshell jacket to vent heat during climbs. Opening pit zips or the front zipper lets you regulate temperature without removing layers, preventing sweat buildup that can lead to hypothermia when you stop.
Packing Tips for Multi-Day Treks
Packing your layers for a multi-day Nepal trek starts with compression sacks. A 20-liter dry bag with compression straps can shrink a bulky down jacket to the size of a loaf of bread, freeing space for other essentials. Store your mid layer fleece or softshell in the same sack, but keep your base layer items separate to avoid compressing the down's loft.
For summit pushes above 4,000 meters, you must carry spare layers in your daypack even if the morning sun is warm. A lightweight down jacket and a rain shell can mean the difference between a successful summit and a dangerous cold stop. Stow these in a small stuff sack at the top of your pack for quick access during rest breaks.
Drying wet layers in tea houses requires strategy. The humidity from cooking fires and fellow trekkers lingers, so wring out your base layer and mid layer items using a dry towel before hanging them near the stove. Keep them at least a foot away to avoid melting synthetic fabrics. A clothesline strung across your room works well for merino wool base layers, which dry faster than cotton.
Weight-conscious packing means leaving behind anything you won't use daily. Cotton jeans, a second pair of hiking underwear, and a heavy fleece jacket are smart deletions. Stick to one multipurpose set: a merino wool base layer, a fleece mid layer, a down jacket, and a waterproof shell. This how to layer for cold weather hiking approach keeps your pack under 12 kilograms for a typical 10-day trek.
Final Thoughts
Trust Your Layering System and Enjoy the Trek
The three layer system of base, mid, and outer is the proven foundation for staying warm, dry, and safe on cold weather mountain hikes. In Nepal, where temperatures can swing from freezing pre dawn to blazing midday sun on the same trek, knowing how to layer for cold weather hiking becomes a survival skill, not just a comfort preference. Each layer has a distinct job: the base layer wicks moisture, the mid layer traps heat, and the outer layer blocks wind and precipitation. When all three work together, you create a microclimate that adapts to your exertion level and the shifting conditions above treeline.
Before you set foot on the trail, test your mountain hiking clothing layers on a local hike with similar temperature ranges. Wear your full setup for at least two hours, moving at trekking pace, to check for binding, excessive sweating, or cold spots. A quick walk around the block won't reveal whether your rain jacket vents well enough under a pack or if your fleece jacket hiking layers cause overheating on ascents. Adjustments like swapping a heavy mid layer for a lighter one, or adding a merino wool base layer under a shell, are far easier to make at home than in a teahouse in the Khumbu.
Invest in quality pieces that will last through multiple seasons and trips. A well chosen down jacket mountain layer with 800 fill goose down, a durable softshell jacket for active use, and waterproof hiking pants with side zips may cost more upfront, but they outperform budget gear in breathability, compression, and longevity. Brands like Patagonia, Arc'teryx, and Rab offer reliable options that hold up to Nepal's rugged conditions.
Trust your system. When you have dialed in your hiking layering system, you can focus on the trail ahead, the rhododendron forests, the suspension bridges, the first glimpse of Everest. With the right layers, you stay comfortable, dry, and safe, no matter how the weather turns.
Official sources
Details worth verifying before you go — checked against:
Travel Writer & Editor
Emily Johnson writes and edits Do Travel Blog. Every guide on the site starts the same way: with a question she actually had while planning — when to book, which pass to buy, how to get from A to B without overpaying. Where a number matters, she cites the source: park tickets link to the park's own fee page, visa rules to the official consulate, ferry times to the operator. Prices get re-checked against those pages before each update, and a guide is re-dated when its numbers move. Nothing here is sponsored — she doesn't accept payment for coverage. Spotted something stale or wrong? Email hello@dotravel.blog and she'll fix it.